The last cover I made is embossed with Elegant Lines Impressions Folder on the sides and I cut 4 strips, 1" X 4-1/2", and embossed them with a Cuttlebug Borders Folder. Use a bigger oval Nestie on the lid than the one you use to cut the opening in the 4-1/4" square piece on the top. Embossing that square piece is also nice. Sometimes I make my own flowers to decorate the top, but on my last one, I used flowers that were purchased from Michael's. I also line the insides with more card stock to make it sturdier or I add embossed panels to the outside. I just don't think one layer of card stock is going to last that long. One, more tip: Use Sticky Strip or other strong adhesive to put it together. You don't want to give a gift that will fall apart in a week or so! Have fun, and if you have any more questions, please feel free to email me at davis4him517@sbcglobal.net
Showing posts with label Tutorial. Show all posts
Showing posts with label Tutorial. Show all posts
Monday, September 12, 2011
Tissue Box Cover Instructions
I went to a Foster Care training for two days (so far), and I have to go for one more day next Saturday in order to get my 27 hours of training before applying for my license. I haven't posted anything since Friday. I have received a couple of requests for instructions for the Tissue Box Cover like I posted on Friday, so I have put the video tutorial found on Splitcoast Stampers on my blog. Please go down to the bottom of this page to find that video tutorial for the Tissue Box Cover.

Tuesday, December 21, 2010
Tissue Flower Tutorial
I was asked how I made the flower on my Mojo Monday Sketch Challenge card. I could have just put a link to a blog where I found a video tutorial, but I did mine slightly differently, so I made a picture tutorial. I hope this helps.
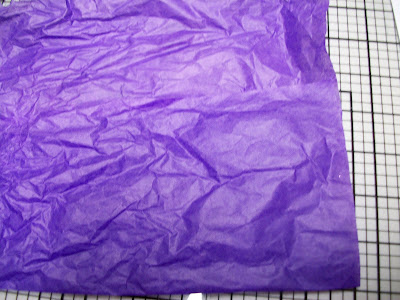
 All you will need is some used tissue that you received in a gift bag. The more winkles in it, the better. You will also need the Scallop Circle Punch. Mine is the old style. Another thing you will need is a strip of paper; copy paper is just fine. Mine is about 2" wide. You will also need a brad (not shown).
 Fold up about 4" or so of the tissue paper.
 Fold again so that there are 4 layers about 2" wide.
 Put the copy paper in between the layers. Mine is unfolded just to show the paper. This paper is needed for punching. Without it, your punched pieces of tissue will just be a mess.
 This photo shows the paper in between the layers, ready for punching.
 Now, I have punched once, giving me 4 punched pieces of tissue and one copy paper. You can toss the copy paper pieces or find another use for them. Do this punching three times, so that you will have 12 punched tissue pieces.
 You will only need ten of the pieces. Save the other two for another flower. Let me know what you decide to do with those copy paper pieces.
 Put five punched pieces together punching the center of each with a brad as you go along. You could use a punch to punch a hole in the center, especially if you are using anything thicker than tissue.
 Holding the ends of the brad in one hand, squish the tissue together layer by layer. In this photo, only the first layer has been squished.
 This photo shows the five layers all squished together. Now, poke the ends of the brad into one piece at a time of the next five pieces, squishing as you go.
 This photo shows all ten layers squished together. Next, you will open the ends of the brad and then start fluffing the layers out until it looks like a flower.
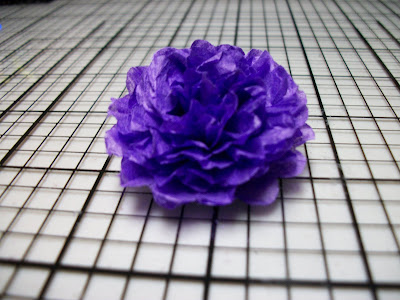 This photo shows all the layers fluffed out. It's starting to look like a real flower now.
 This part is optional. I spritzed the flower with Stampin' Up!s Smooch Spritz, Vanilla Shimmer.
 After I spritzed it, I dried it with my heat tool. It's ready to add leaves or just adhere to a project.
 I used the new "Build-a-Blossom" stamp set and the coordinating punch that will be available from the new Occasions Mini Catalog on January 4, 2011. That's all there is to it! I will add this flower to my next project and post it here for you to see. Thanks for stopping by!!!
 All you will need is some used tissue that you received in a gift bag. The more winkles in it, the better. You will also need the Scallop Circle Punch. Mine is the old style. Another thing you will need is a strip of paper; copy paper is just fine. Mine is about 2" wide. You will also need a brad (not shown).
 Fold up about 4" or so of the tissue paper.
 Fold again so that there are 4 layers about 2" wide.
 Put the copy paper in between the layers. Mine is unfolded just to show the paper. This paper is needed for punching. Without it, your punched pieces of tissue will just be a mess.
 This photo shows the paper in between the layers, ready for punching.
 Now, I have punched once, giving me 4 punched pieces of tissue and one copy paper. You can toss the copy paper pieces or find another use for them. Do this punching three times, so that you will have 12 punched tissue pieces.
 You will only need ten of the pieces. Save the other two for another flower. Let me know what you decide to do with those copy paper pieces.
 Put five punched pieces together punching the center of each with a brad as you go along. You could use a punch to punch a hole in the center, especially if you are using anything thicker than tissue.
 Holding the ends of the brad in one hand, squish the tissue together layer by layer. In this photo, only the first layer has been squished.
 This photo shows the five layers all squished together. Now, poke the ends of the brad into one piece at a time of the next five pieces, squishing as you go.
 This photo shows all ten layers squished together. Next, you will open the ends of the brad and then start fluffing the layers out until it looks like a flower.
 This photo shows all the layers fluffed out. It's starting to look like a real flower now.
 This part is optional. I spritzed the flower with Stampin' Up!s Smooch Spritz, Vanilla Shimmer.
 After I spritzed it, I dried it with my heat tool. It's ready to add leaves or just adhere to a project.
 I used the new "Build-a-Blossom" stamp set and the coordinating punch that will be available from the new Occasions Mini Catalog on January 4, 2011. That's all there is to it! I will add this flower to my next project and post it here for you to see. Thanks for stopping by!!!
Tuesday, November 23, 2010
Cardinal Tutorial
I've been asked to explain how I made the cardinal for yesterday's Clean & Simple Challenge card. I found instructions online, but now I can't find them, and I wanted to time myself anyway, so I made this picture tutorial. While the photos were uploading, I made a few more cardinals. After I took all these photos, I timed myself and it took less than 5 minutes to create one bird, but that was with all the pieces already punched. With another minute or two to punch those pieces, you've got yourself a birdie!
 Please forgive the glare in the first couple of photos. I use the glass cutting mat in my work space. I cut scraps of Cherry Cobbler card stock into 1" and 3/4" strips to be able to insert them into the Bird & Branch Punch easily. The wider strips are for the bird body and the narrower for the wings.
 I also use scraps of More Mustard and Basic Black for the beak and the area around the beak. (Does that black part have a name?)
 I trim off about 1/3 of the bottom of one wing. Cutting the beak out of the black piece, I use a narrower cut than I do on the red so that no red will show.
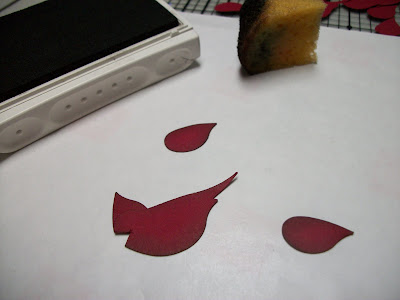 After adhering the top (crop?) to the back of the head, I sponged the bird and the other two wings with Early Espresso.
 Now, I adhere the beak behind the main body that has the beak cut out. Remember to make this cut just a little wider than you do on the black piece.
 Adhere the black piece. Remember to make the cut narrower than on the red when cutting out the beak.
 Adhere one wing behind the body (adhesive on the body) and one wing on the front of the body (adhesive on the wing). I added a tiny black half pearl for the eye.
 Turn it over and attach a Dimensional to the back so that it will be popped up on your project.
 You could use the branch on the Bird & Branch punch, but I thought the Martha Stewart Branch Punch looks more like a Christmas tree.
 The bird I made while taking all these photos is on the top. When I made this other one, I timed myself, and it took less than five minutes. Of course I had all the pieces punched already. Add punching time, and it should take only about six or seven minutes to make one cardinal! I hope this helps!!! Thanks for stopping by!!
 Please forgive the glare in the first couple of photos. I use the glass cutting mat in my work space. I cut scraps of Cherry Cobbler card stock into 1" and 3/4" strips to be able to insert them into the Bird & Branch Punch easily. The wider strips are for the bird body and the narrower for the wings.
 I also use scraps of More Mustard and Basic Black for the beak and the area around the beak. (Does that black part have a name?)
 I trim off about 1/3 of the bottom of one wing. Cutting the beak out of the black piece, I use a narrower cut than I do on the red so that no red will show.
 After adhering the top (crop?) to the back of the head, I sponged the bird and the other two wings with Early Espresso.
 Now, I adhere the beak behind the main body that has the beak cut out. Remember to make this cut just a little wider than you do on the black piece.
 Adhere the black piece. Remember to make the cut narrower than on the red when cutting out the beak.
 Adhere one wing behind the body (adhesive on the body) and one wing on the front of the body (adhesive on the wing). I added a tiny black half pearl for the eye.
 Turn it over and attach a Dimensional to the back so that it will be popped up on your project.
 You could use the branch on the Bird & Branch punch, but I thought the Martha Stewart Branch Punch looks more like a Christmas tree.
 The bird I made while taking all these photos is on the top. When I made this other one, I timed myself, and it took less than five minutes. Of course I had all the pieces punched already. Add punching time, and it should take only about six or seven minutes to make one cardinal! I hope this helps!!! Thanks for stopping by!!
Wednesday, May 5, 2010
Flower Instructions
Every week I get the Weekly Inkling, an online publication from SplitCoastStampers.com, emailed to me. There's always some sort of tutorial along with other helpful hints. This week's tutorial is presented by Beate and includes a video tutorial as well. I have added that tutorial at the bottom of this page. I have had MANY requests for the instructions for making the paper roses. This tutorial is a little bit different, but it is along the same lines. It uses a six petal flower instead of a five petal flower and ends up looking like a flower other than a rose. It's nice to have more than one kind of flower available for your projects anyway. You could adapt the instructions to work with a five petal flower such as the Fancy Flower Punch; then, it would look more like a rose. I give full credit to Beate and to SCS for the U-Tube video presentation. Please go to the bottom of this page and check it out!
Thursday, January 7, 2010
Simple Box Tutorial
I created this tutorial this morning for one of my Twisted Sisters because tomorrow's Twisted Sistahs Challenge is to make a box. Well, the file was too big to email, so I printed it, scanned it and attached it to a post on the TSC Thread at SCS. If you've never done that, you probably have no idea what I'm talking about! Anyway, I decided to post it here for all to see!
You will need:
Card Stock for the bottom of the box
Designer Paper OR Card Stock for the top of the box (I used DP here)
A Ruler (One Foot Long)
Pencil
Bone Folder
Scissors
Adhesive
You will need:
Card Stock for the bottom of the box
Designer Paper OR Card Stock for the top of the box (I used DP here)
A Ruler (One Foot Long)
Pencil
Bone Folder
Scissors
Adhesive
Cut DP or Card Stock to 8-1/2" square for top.
Cut Card Stock to 8-1/4" square for bottom IF you are using DP for the top. Cut to 8-3/16" square if you are using Card Stock for the top. This allows for a good fit.
Using the ruler and pencil, draw a line diagonally from corner to corner and another line the same way to form an "X". See photo below. Fold one point to the center of the "X" as shown.
Fold again, aligning fold line against the pencil line as shown. Follow the last step with all four corners, folding and unfolding. Your paper or card stock should look like the photo below.
 Cut one end for the edge just to the corner of the center square. Do this on both sides of one end. Cut the other end the same way as shown.
Turn the paper so that the uncut end is facing you as shown. Apply adhesive to the inside of the triangle piece and fold twice, matching up the tip of the triangle with the center of the pencil lines. You are forming one side of the box (top).
 Fold the end pieces in to form half of another side. (See above) Do the same on the opposite side. Match centers and adhere as shown below.
 Apply adhesive to the remaining end triangles. Fold over and in, matching tips of triangles with center of box.
 Follow the previous step for the other side.
  The top of the box is finished!!
 The bottom of the box is cut 1/4" smaller than the top for better fit. If you make the top out of card stock (especially SU! card stock!), you must make the bottom 5/16" smaller. See the second step above for my measurements; however, you can make these boxes any size you want as long as the bottom is slightly smaller than the top.
 Once your box bottom and top are made, you can decorate your box as you like.
 I will decorate this one tonight for the challenge tomorrow. Then, I will post the final decorated box here. See you!!
Subscribe to:
Posts (Atom)